This guide explains how to protect and burn Software DVDs with the ProtectBURN Software application together with the Protect Software web site for protecting executables, DLLs and PDF files.
With ProtectBURN Software it is possible to protect and burn regular DVD-Rs in a copy protected way directly from an existing DVD or ISO image.
To use ProtectBURN Software the following is required:
The workflow of creating a protected DVD with software is basically very simple. However, it is important to understand which steps are required and how the licenses (or missing licenses) influence the created DVDs.
To create a protected software DVD the following steps are required:
1. Creating a Product
A product links protected executables, dlls or PDF files to a certain protected DVD. Protected executables, dlls or PDF files accept only DVDs as original, which are protected by using the same product.
2. Protecting the Executable, DLL or PDF file
The Executable, DLL or PDF file is protected by specifying the product and the protection settings. For doing this the file to be protected is uploading to the Protect Software web site where it is protected and made available for download after the process completes. Each protected file contains a unique watermark which can be used to trace back possible leaks.
3. Creating the DVD to be protected
The protected executable, dll or PDF is combined with all other files for the DVD and a DVD image is prepared by using standard mastering software such as Windows integrated DVD burning or tools such as Nero, ImangeBurn, etc.
4. Applying the protection to the DVD
The protection for the DVD is applied. As part of this the same ProjectID that has been used for protecting the DVD needs to be specified. The result is an encrypted DVD image that can be burned on computers with ProtectBURN.
5. Burning the DVDs
In this step you burn the protected ISO. Depending on the availability of burn licenses, the DVDs will be burned in DEMO mode with warning message or as regular copy protected DVDs. Please see the table below for details.
| License availability / Configuration | ProtectBURN installed / Burn licenses available | ProtectBURN installed / No burn licences available | ProtectBURN not installed |
| Resulting DVD | Successful burn of DVD with copy protection | Successful burn of DVD with warning message | Broken DVD |
The warning message which is shown when a DVD is burned without a burn license looks as follows and will disappear within 30 seconds.
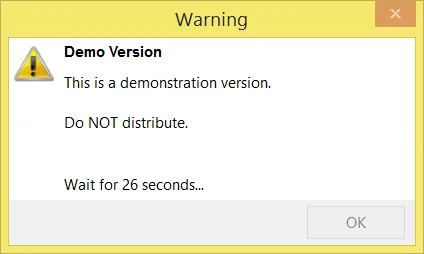
To burn without the warning screen, you need to purchase licenses.
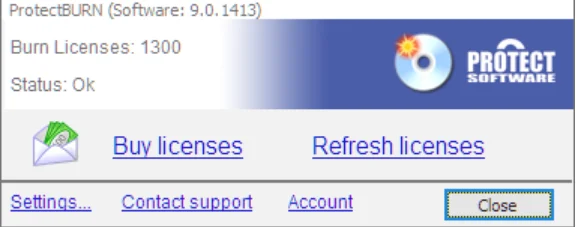
You can purchase burn licenses from the Protect Software Burn Licenses Web shop. To get there select the “Buy Licenses” option from the Protect BURN Tray Application.
After you select the “Buy Licenses” option, your browser will open and display the web shop for the burn licenses.
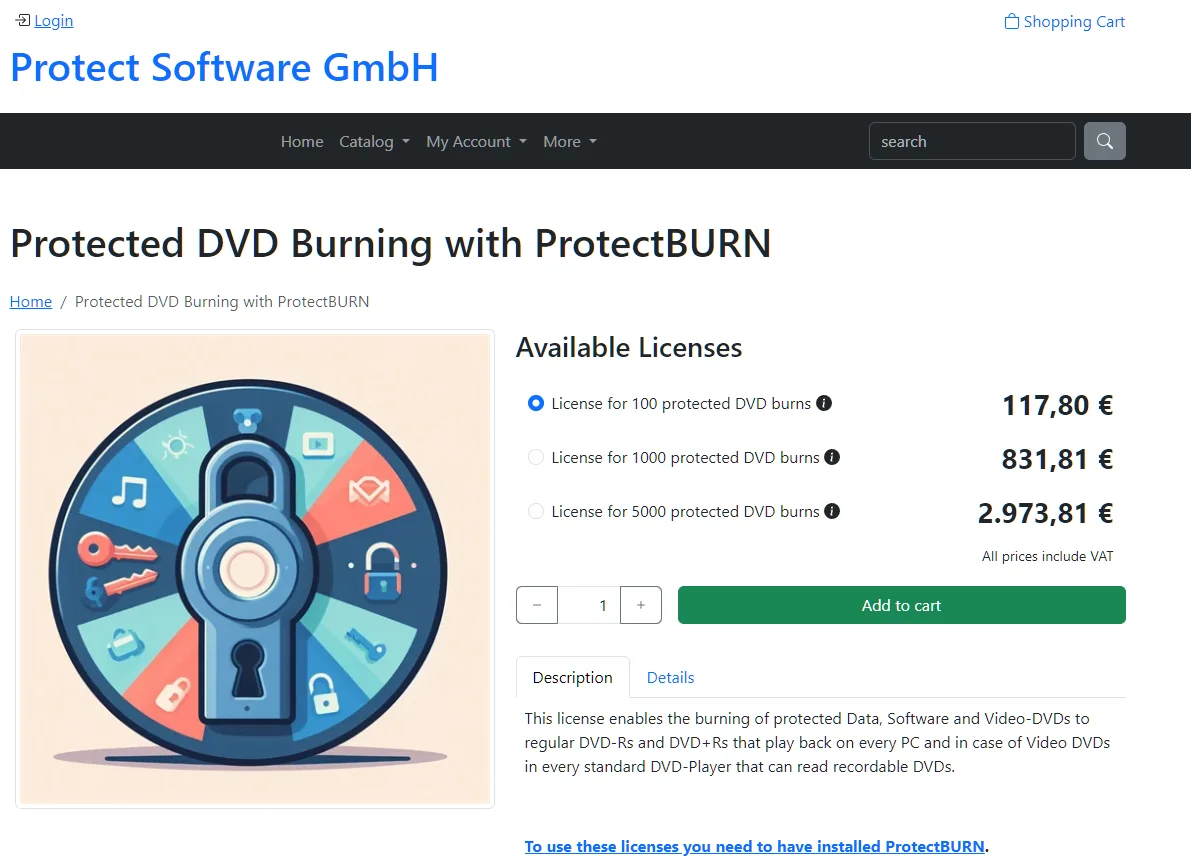
The web shop offers different packages of burn licenses. The higher the number of purchased licenses is, the lower the price per license gets.
After the purchase completes, the licenses are available in the try app. Take care that you sign in with your email and password from the license order process (click Account in the tray app).
Important! One “burn license” is valid for exactly one burn. This is independent of the protected DVD. So, with 10 burn licenses, you can protect 10 DVD-Rs of one title or you can also use them for 10 different titles with one protected DVD-R each.
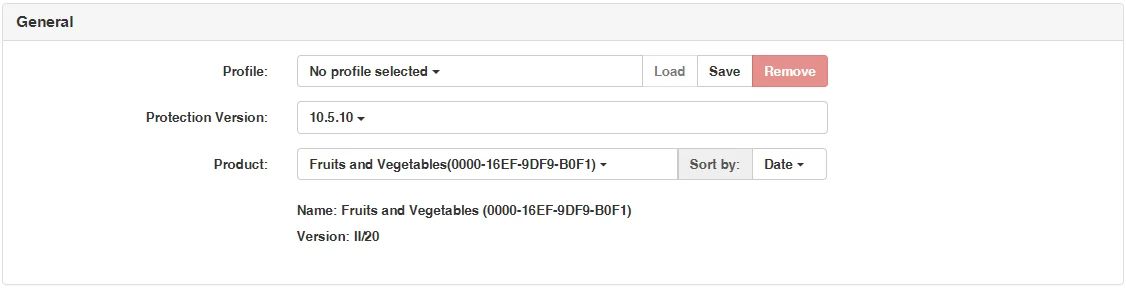
Every protectied executable/app is assigned to a specific Product. Products are created in the web admin interface.
Note: The screenshot above shows the product creation for a company that does not have ESD (electronic software distribution) enabled. If ESD is enabled, additional information has be specified.
For Software protections the executables/apps need to be protected to become robust against hacking attempts and check for exactly the correct USB stick/UnlockCode/Purchased license to be present for validating the permission to run.
To protect one or more Executables/Apps the “Products -> Protect executable/app” function must be used.
Use these settigns to specify fundamental properties such as which potection to use and which product is assigned.
| Option | Description |
| Profile | A profile enables you to save the protection options. If you frequently protect executables/apps with identical options, it saves you time and reduces the chance of errors to create a profile. When loading a profile, all saved options are applied. |
| Protection Version | This selection enables you to slect the version of the protection. Sometimes there migth be different versions with different features sets to select or you might be able to use an older version. This can make sense if you have done your testing with a version which was availabel before a new version got released and you don't want to retest nor you need the new functionality. |
| Product |
Each protected executable is linked to a product which uniquely identifies the execuable. If don't have a product defined yet, you need to do this before you can protect the execuable/app. If you use the "Purchase" option, the shop uses product related options for pricing, UnlockCodes, etc. More information about the selected product is diplayed below the product selection. |
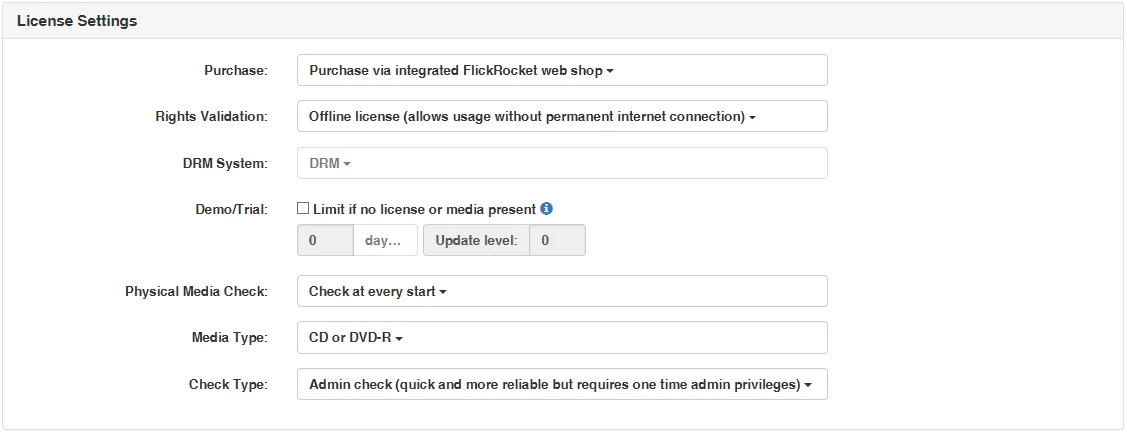
Use these settings to define the behaviour of the excutable/app such as whether or not it can be purchased, if a media is validated, if a demo/trial version is offered, etc.
| Option | Description | Visibility |
| Purchase |
None: With this option the executable does not require being purchased from the FlickRocket web shop nor does it require an UnlockCode for working. This is for example a typical setting if the executable/app is locked to a protected media such as CD/DVD/USB stick or the protection serves to prevent re-engineering. Purchase via integrated FlickRocket web shop: With this option the protected executable/app requests a purchase from the FlickRocket web shop if no valid license from such a purchase (or other validation such such as original media) exists. The web shop is managed in the web admin interface. Purchase via entering UnlockCode: With this option the protected executable/app requests an unlock via UnlockCode if no valid license from such an UnlockCode (or other validation such such as original media) exists. UnlockCodes are created and managed in the web admin interface. |
Always |
| Rights Validation |
Offline license: With this option the license validation is performed offline via a device specific license file. An internet connection is only required at the time the license is stored. The software can work without internet connection. Online check: With this option the license validation is performed online. Because of this, a near constant internet connection is required. The advantage to offline licenses is that it is possible to share a single license over multiple work places as long as the number of concurrently allowed licenses is not exceeded. |
Only with purchase option |
| DRM System | Admin use only | Only with offline license rights validation |
| Demo/Trial |
With the demo/trial option the protected execuable will run in demo/trial mode with the limitations defined below, as long as it is not purchased via the FlickRocket web shop or by UnlockCode. The FlickRocket shop offers the possibility to offer a file protected with this option as demo/trial version to potential customers as part of the shop. |
Only with offline license rights validation |
| Time Limitation | This time limitation defines how long potential customers can use the protected software. During and after the time frame, they can select to purchase the software, depending on your previous settings, through the FlickRocket web shop or via UnlockCode. | Only with offline license rights validation and demo/trial option |
| Update Level | The update level is used to enable customers whose demo/trial period has been exceeded to use a new trial/demo period for an updated execuable. If a new demo/trial period should be possible, the update level needs to be increased. Otherwise, exceeded demo/trial periods will stay exceeded also for new versions. | Only with offline license rights validation and demo/trial option |
| Physical Media Check |
This option defines if, when and how often an original media (CD/DVD/USB Stick) is validated to allow the protected software to run. For software which is sold online or unlocked via UnlockCode this is typically set to "No media check". For software distributed on copy protected media typically one of the "Check..." options is selected. It is possible to combine media checking with online purchase or UnlockCode unlocks. In this case the protected software will run once one of the validation options is true. |
Always |
| Media Type | If media check is enabled, this option defines which media type is checked. Select the media which you plan to protect and use for the distribution of the protected software. | Only with media check |
| Check Type |
Admin check: This check type requires admin privileges at the first run of the software (or install). It is the most secure checking method but should not be used in enviromenments (typically office/big organizations) where the customer might not have administrative rights for accessing his computer. Standard check: This check requires only standard user rights. It is somewhat less secure but is the only option for some enviromenments (typically office/big organizations) where the customer might not have administrative rights for accessing his computer. |
Only for CD or DVD-R media check |
Use these options to modifiy the text/design of the protected executable/app.

| Option | Description |
| Customized Startup Logo | This logo is displayed during the startup/checking process of the protected executable |
| Text/Localizations | This option can be used to upload modified (and previously download) string tables for the protected execuable. Every text displayed by the protection can be changed and additional languages can be added by uploading this file. |
Use these options to manage an expiration date for the execuable/app, which is independent of the license.

| Option | Description |
| Expiration date | If specified, the protected executable will cease to work at this date. This feature is for example used for software with expiring data - so that the application cannot be started once the data expires. |
| Update level | The update level is used to enable customers whose expiration date has been exceeded to use a new/updated protected execuable. If a new use should be possible, the update level needs to be increased. Otherwise, exceeded expiration dates will stay exceeded also for new versions, even if a new expiration date is specified. |
After applying the protection you can download the protected executable to be used for the disc to be protected.

The Protect Software web site holds an archive of protected executables. You can access this archive by selecting “Products -> Protected executables history”.
The site lists the settings you used for the protection and allows you to download the protected executable as well as protect a new file using identical settings.
If your protected executable or app is part of an installation, you need to build the installation, add any other files that are required and create a DVD image.
To create the DVD image you can use any software capable of creating ISO images such as the free ImageBurn. There are no special requirements on how the DVD Image is created and what file systems or file names are used.
This chapter describes the “Protect .ISO image” function step by step.
The following wizard will shop up.
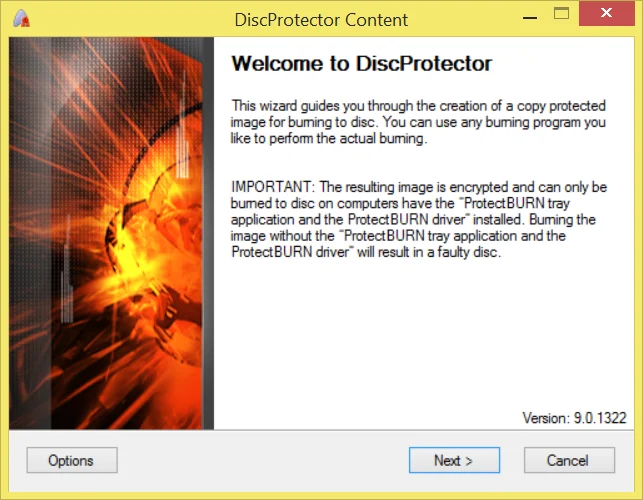
When you see the “Welcome” page, click on “Next”. If this is the first time you use this function, the option dialog will appear and you are able to enter some default settings.
| Option | Description |
| Default source path | Default path to the directory specified here when browsing for source data. |
| Default destination path | Default path to the directory specified here when browsing for a destination folder. |
| Temporary path | This path will be used to store intermediate data. Specifying a hard drive different from source and destination can speed up the processing time. |
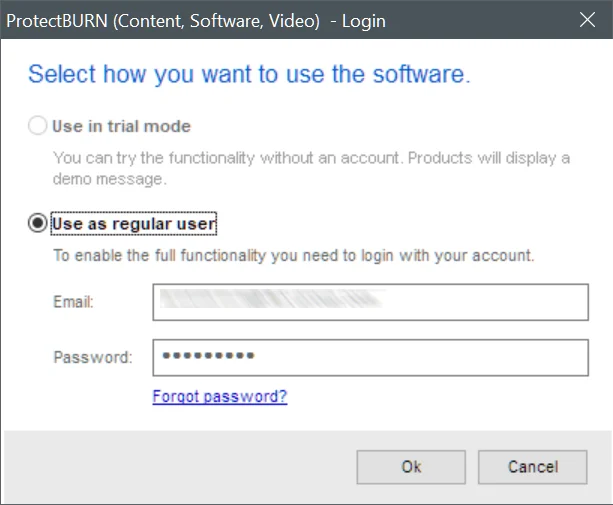
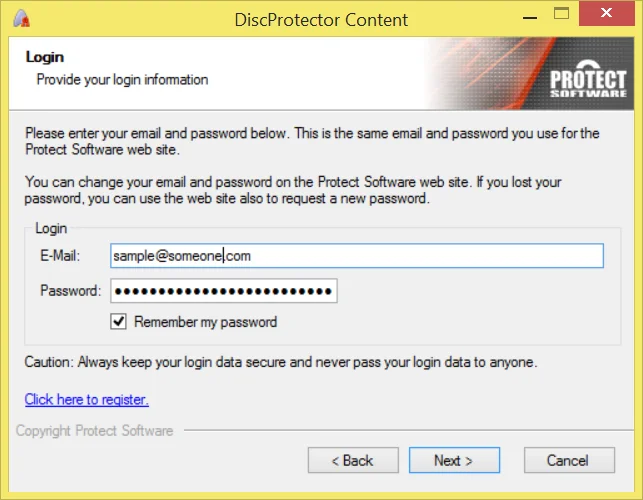
The next page shows the account data you are currently using.
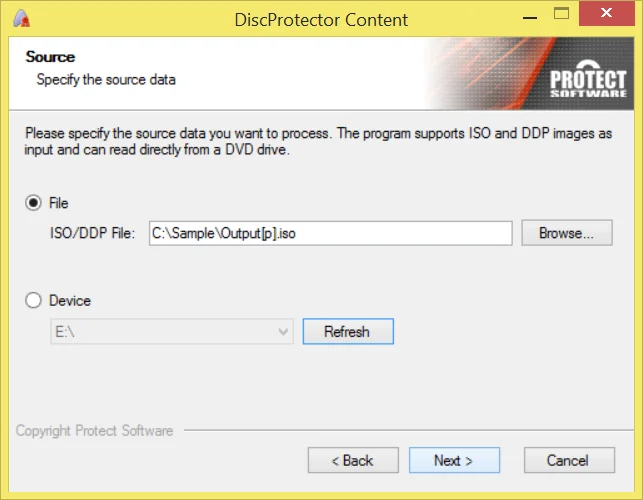
Now you need to specify the ISO image you have created earlier. If you have created the ISO image directly previous to this step, it might already be filled in and you can click “Next” to continue.
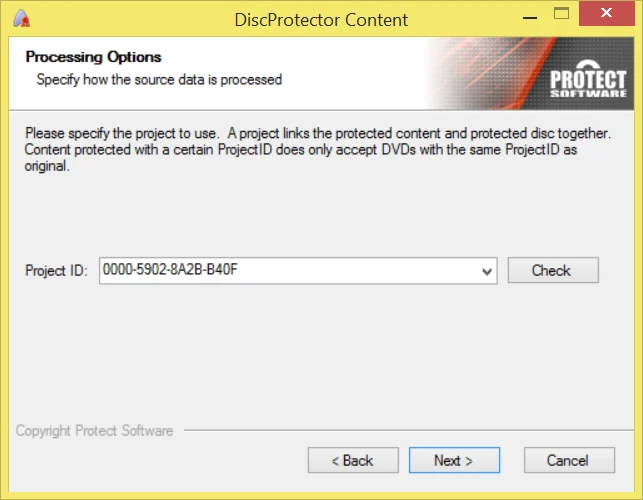
This page shows the ProjectID for the protected DVD. It must be identical to the ProjectID specified when preparing the content.
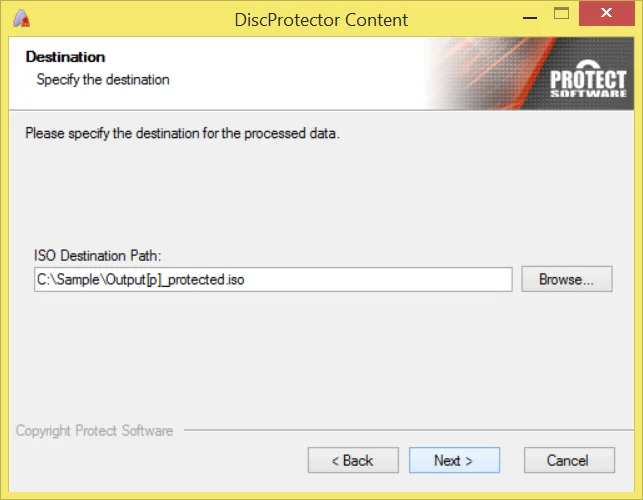
Now you need to specify the destination for the protected ISO image. If you have created the ISO image directly previous to this step, it might already be filled in and you can click “Next” to continue.
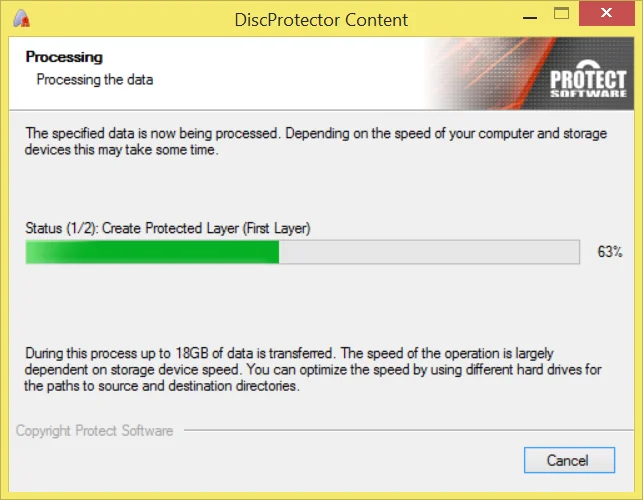
Your ISO will now be processed and the protected output ISO image is created. Depending on the speed of the hard drives/network connections this will take some time because up to 15GB of data is transferred.
Important: The protected ISO can be burned with any compatible burning Software if ProtectBURN is installed and active (which requires a reboot after installing) on the computer. This is only an example - using the free ImageBurn.
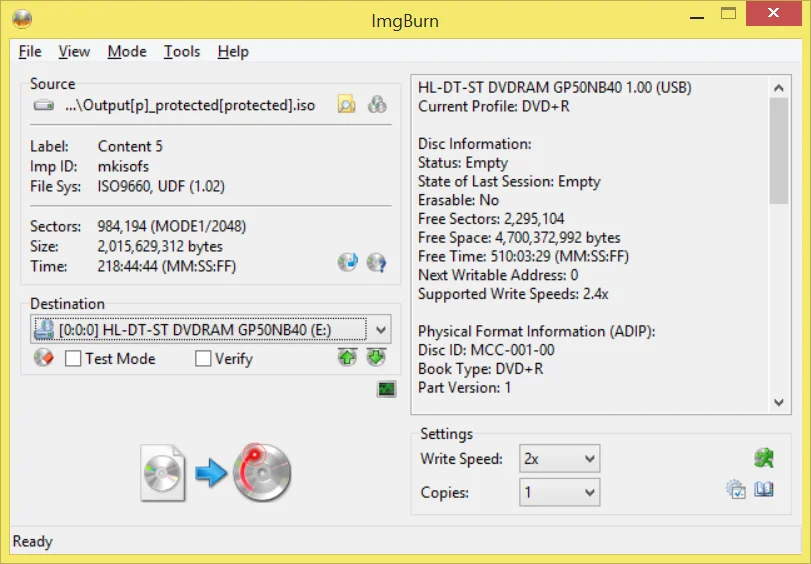
During burning please always note the pop-ups displayed by the ProtectBURN tray application. These pop-ups will inform you about the remaining licenses.
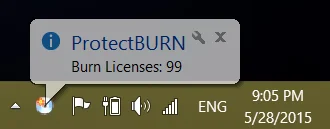
Important! If no burn licenses are left, burning is still possible, but the resulting DVD will display the warning message that this DVD is not allowed for distribution.
Following you find a list of the frequently asked questions. If this does not answer your question, please contact support@protect-software.com.
I forgot my password. What can I do?
You can use the “forgot password” function of the www.protect-software.com web site.
I have purchased more burn licenses than I need on this computer. Can I transfer them to another computer?
Yes. Simpley install the software and sign i with your account data from the license order.
I want to use the protected DVD as source in a burning tower. Is this possible?
No. The DVD has a copy protection and copying the DVD is not possible, especially not with keeping the protection.
I want to perform an industrial replication of a protected DVD. Can I use the protect ISO image of the protected DVD as source?
No. The protected image is encrypted and the protected DVD is copy protected.
Can I use ProtectBURN Software also for Video DVD protection?
Not this software but you can use the ProtectBURN Video to do this.
Can I use the protected image with automated duplication devices?
Yes, as long as the data written comes from the computer on which the ProtectBURN software is installed.